Some Basic Information About My Site and My Files:

First a note about my files:


All my files are for personal use. I do not charge for any files I create. I share them here for others to use for personal use only. Please do not use them to submit for contests, etc. without getting my permission first. Please give credit where credit is due. I will try to do the same. This means I will try to identify where I got an item or a project if I didn't create it myself and there is an identifable source. Sometimes however I use basic clipart or coloring pages. You may however share these files with others for their personal use (you may not charge for them - you may pass them on for free) or you may point them here to my blog to get the files themselves. If a download file is available, it will appear at the bottom of the post and will be in a different color text.


PLEASE NOTE: I reside in the USA where we use the MM/DD/YYYY date format on computers (and in everything else we do!) If you are outside the USA where they use the DD/MM/YYYY date format on computers, you MAY experience an "Unhandled exception" error when you try to open one of my Cricut DS files. It is an error related to the date format. An easy fix is available at SusanBlueRobot's Blog. Susan has a simple HexEdit program and directions which will allow you to alter the date so you can use the files. Note: This is only an issue if the save date of the file is after the 12th of the month! It is also only an issue with DS files. I have never seen this issue with MTC or SCAL.

Tuesday, December 7, 2010

Intricate 3-D Christmas Tree

Okay, Just had to share a picture of this beautiful christmas tree.  I got the pattern from the 2010 Holiday, Issue 41 of Scrollsaw Woodworking & Crafts magazine. It has several more patterns of things I plan to use with my Make The Cut Software.  I have previously noted that Scrollsaw patterns are a great source for things to cut with an electronic die cut machine.  This pattern was created by Gloria Cosgrove. (She was also the creator of the "Treasures of the Sea" seashell patterns.  You can find more of her work at http://www.papercuttingsbyalison.com/.)  Unfortunately, I can't share the pattern with you do to the magazine's copyright permissions.  : (  I have some other things to share with you all as soon as I get some time to set down and get it all organized!

I must also say that I cut this using "tagboard" that I found at Hobby Lobby.  It is a little thicker then cardstock.  I tried cutting with regular cardstock.  It is a little too flimsy.   If anyone knows where I can get a little thicker paper like tagboard in colors please let me know. I tried cutting it on my Cricut Expression - didn't cut so well - either tore up the paper or left all the little pieces still inside and I was having to try and finish punching them out.  I recently bought a Black Cat Cougar 18" die cutter.  It cut on there beautifully and didn't have to finish punching out lots of little pieces!! You can find out more about the Black Cat Cougars at thatscrapinc.com.

If you aren't familiar with Make the Cut software I would highly recommend that you go to their website to learn more about it.   You can find it at http://www.make-the-cut.com/.  It allows you to do so much with your die cutter. You will be amazed. You are limited only by your imagination!! You can check out their forums for more great ideas.  The best news is that Andy, the developer, is about to release the official new version 3 which adds so many more great features to this amazing software.


Friday, November 12, 2010

Purse Gift Card Holder

Hello.  I've been working on this file and had meant to get it up earlier this week.  I had my crafting buddies (Names in ( ) are names used on CricutMB), Rheba (DazyCutr), Margaret (mlharrell) and Kristen (KristenLong) try my files out on Tuesday. They seemed to work for them.  Then I had to find time to do all the work needed to get them on the blog to share.  That can be a time consuming process!  LOL  Then I had a busy week with other stuff so here it is Friday and I think I am ready to put these up.  I an uploading a pdf file showing the score lines.  However, PLEASE NOTE, the score line file is NOT to scale.  It couldn't be to get it on a printable 8 1/2"x11" sheet of paper.  It is for visual use only.  One day I will get down putting score lines in my projects themselves.  Jsut haven't gotten there with this one sorry!  LOL

I got the idea for this file when I saw a Purse Gift Card Holder at a local large box retail store and thought "hmmmm. . . . . I could probably make that!"  So I did.  The "purse" opens and sort of "pops up" the gift card.  The original file size needs a larger mat than 12x12 (the 12x24 mat on the Cricut).  Paper size needed is 19" long for those with other cutters.

However, I thought that most people would prefer to use the 12x12 mat and 12x12 paper so with some work, I was able to create a file that cuts separate pieces that you need to glue together.  There are really only 2 parts that you have to cut, but the file does have a back "overlay" piece for those anal people who don't want the "overlap" of the two pieces showing.  You can overlap the two pieces either on the inside or on the outside (this looks good if you use contrasting patterned paper for the top and bottom pieces!)

Without further ado, here are my files.  There are files for Make the Cut (MTC) and .svg for those with other software and/or cutters.  I created my original files in MTC and then exported them out to .svg.

Download the Large Mat (12x24) 1 Piece Make the Cut (.mtc) cut file here.

Download the Small Mat (12x12) 2 piece Make the Cut (.mtc) cut file here.

Download the Large Mat (12x24) 1 Piece .svg file here.

Download the Small Mat (12x12) 2 piece .svg file here.

Download the .pdf file showing the score lines here.

Download the .pdf file showing the glue lines for the 2 piece file here.

The handle of the purse can either be made in a couple of ways. The one I saw basically used a pipe cleaner and did not put holes but just put it around the sides and folded it inside. I punched small holes and used pipe cleaners and or small wire and added some cheap beads I had just to see how that would look. Feel Free to use your imagination!! I only show pics of ones wit the beads.  The pipe cleaners also worked well. Then you put a piece of velcro to hold the purse flap down.
Thanks for stopping by.  Please show me what you make with the files.  I love to see that people actually use my files!  LOL  Pictures of mine are just "rough mockups" of the files to make sure that they really work! Would love to show some really blinged out! Hopefully with the pics and the .pdf files you will be able to figure out how to put this together.  If not, please leave me a comment with any questions.  Leave your email if I need to contact you.  I will not publish the email address.

2 pieces cut on 12x12 mat

2 pieces adhered together with top overlayed on outside

Where to Glue on Top Piece

Where to glue on bottom piece then adhere top and bottom together

1 Piece cut on 12x24 Mat - no gluing or joining pieces needed!

Friday, November 5, 2010

Volleyball Window Cling and Volleyball .svg and .mtc files

Original Window Cling
Using DS and Sports Mania Cart
I had previously shared the window clings I had made with vinyl for My DD for Volleyball and my DS for football.  I originally made them and shared them more than a year ago.  Since I had the Sports Mania cartridge, I simply used the volleyball and football off of that cartridge and used Design Studio to add their names and the school name.  I have had inquires about them off and on since I first shared.

Recently, I had several new inquires looking for the Volleyball cut file from people who did not have either a Cricut and/or Design Studio or a Gypsy.  Since the volleyball I originally used was a copyrighted file from the Sports Mania cartridge, I couldn't use it to quickly make another file type to share with you. Several said they had searched for an .svg file to use but had not had any success.  I too searched for one and didn't find one so I have created two new and different files using two basic shapes, a circle and a ( ! 

"Full" Volleyball
.mtc or .svg file available
One file is a full volleyball with all the lines and the other file is a "cling" or "decal" with a "blank" area on the ball to add the child's name and/or number, school name, etc.  You would need to cut it in vinyl to adhere to your car window.

As a result, there are several different files and  formats available for download.  I originally didn't share my Design Studio .cut file as I thought it was simple to recreate. However, several people needed help with that as well. Therefore I am also now sharing my original volleyball file created in Design Studio (DS) using the Sports Mania Cartridge and Basecamp for the font and have also converted it to a .gypsy file for those without DS but with a Gypsy.  I have also created Make the Cut (.mtc) files and then exported those out to .svg files for people with SCAL and/or other software or cutters.  So hopefully, there is something here that you can use. LOL


Window Cling with Blank area
for personalization by you
.mtc or .svg file available

I hope that someone finds some use for these files.  As always, I appreciate any comments and especially those who take the file and actually do somethimg with it and then come back and let me know so I can come take a look! Those have been extremely rare but greatly appreciated!

You can see my original post showing the football and volleyball here.

Download the Design Studio (DS) Volleyball Decal .cut file using Sports Mania and Basecamp Cartridges. Replace my child's name and school name with your's or modify as you desire.  I used the Hide Contour feature to hide the lines not wanted on the ball.

Download the Gypsy Volleyball Decal .gypsy file using the Sports Mania and Basecamp Cartridges. Replace my child's name and school name with your's or modify as you desire.  I used the Hide Contour feature to hide the lines not wanted on the ball.

(Note: Basecamp was the font I used for my child's & school's name - you can use any font cart).

Download the full Volleyball Make the Cut (.mtc) file. This is a complete ball with all lines in the middle.

Download the full Volleyball .svg file. This is a complete ball with all lines in the middle.

Download the Volleyball Window Cling for Make the Cut (.mtc) file. This ball has lines missing in the middle to add your child's name, number and/or school or club name, etc.

Download the Volleyball Window Cling .svg file. This ball has lines missing in the middle to add your child's name, number, and/or school or club name, etc.

As always, leave me a comment if you have questions, problems or simply want to say Thanks!   Thanks for stopping by!

Wednesday, November 3, 2010

Circus Party Invitation or Card

"Closed Card" with pullout tab
Regular Card with no tab


Sorry.  Circus Week was interrupted by a trip out of town to our State's High School Volleyball Tournament last week with my DD and her team. They came in 3rd!  Not what they hoped for, but still a great showing!!  Then I have been trying to catch up on being gone for most of the week last week! Now club VB tryouts have begun and DS has finished football and Basketball has begun!

Anyway back to the Circus one more time!  LOL  One of the ladies at our school saw the circus decorations we made for our carnival and said "hey" I could use those for my son's birthday party and make it a circus theme and save lots of money!  However, to do that, she wanted a circus tent invitation to send out and asked for my help in creating one for her to use.

Open Card with Tent Insert
Since I already had the Carousel Lite Cartridge, I whipped her up a couple of ideas to pick from.  Both used the circus tent from the cartridge but one opened up completely like a regular card and one was sealed all the way around except for the very bottom. I refer to it as the "Closed Card."  I added a tab place at the bottom (using the George Cartridge circle) to pull out the "insert".  I think you can see this in the pictures.  Then, I gave her the choice of creating a "tent" insert or a ticket to put the party information on.  She elected to use the ticket and the tent invite that was closed but pulled out from the bottom. 

Open Card with Ticket Insert
I think they turned out really cute and she was pleased with her options. 
So, as not to let them sit around unused on my computer I am sharing my files here. SInce I used PC's Carousel Lite cartridges I only have files for Design Studio and the Gypsy available here at this time.  If you really like this idea but don't have either Design Studio, a Gypsy and/or the Carousel Cartridge,  I am sure that you can google circus tent and find some clipart to use to create a .svg for use with Make the Cut (MTC) or with Sure Cuts A Lot (SCAL) or whatever software and/or cutter you might have.  You can also easily create a "ticket" by cutting out a rectangle and using a small circle punch on each of the four corners (cut a half circle on each corner).  I haven't had time to try to find another circus tent image and create either a .mtc or .svg file myself sorry!

Download the Circus Tent Card/Invitation .cut file for DS using the Carousel Lite and George Cartridge.

Download the Circus Tent Card/Invitation .gypsy file for Gypsy using the Carousel Lite and George Carts.

Note: George was used to create half circle needed for thumb pull out tab.  Any circle can be used.

This shows Fold and Glue Lines

The file contains multiple pages, the first page cuts 2 red bases with the thumb tab, the second page cuts 4 of the white stripe overlays, the third page cuts 2 of the tent insert card, the fourth page cuts 4 of the ticket inserts, and the 5th page cuts 1 red base without the thumb tab for a traditional card that opens completely.  To create the pull out card simple fold in the middle of the card lining up all sides.  Then add a thin strip of glue or double stick tape to the top and right side of the card leaving the bottom open to pull out the insert.

This shows "Closed Card" with Tent Pullout

"Closed Card" with Ticket Pullout


Please feel free to leave me a comment especially if you have any questions on my files.  If you do have a question, please leave me an e-mail address to contact you at.  I will remove your address before publishing the comment.  Thanks for stopping by.

Tuesday, October 26, 2010

Circus Images cut with Cricut and Blown-up Life Size


Yesterday I shared with you a .mtc and .svg file of a circus elephant balancing on a ball.  Today, I wanted to show you what we did with him.  We created large cutouts using plywood to decorate our carnival with Circus animals and performers.  To do this, I cut out the shapes with my cricut as large as I could on a 12x12 mat.  We then took those shapes and used an overhead projector to trace the images much larger onto plywood.  We then used a saw to cut them out, we painted them and volia - great circus images decorating our school for our week long Greatest Webbfest on Earth celebration!  The stars on the balls were cut using vinyl with my cricut. These pictures show the elephant I shared yesterday blown up and painted.  We also used a lot of the images from the Lite Carousel Cartridge from PC.  We created clowns, Lions, a Lion Tamer, Dancing Bears, a Circus train, a Circus Tent, a canon, popcorn boxes, ticket booth, large tickets, and more!  Everybody loved them!  Thanks for stopping by.  Please feel free to leave a comment with any questions and I will get back to you as soon as I can.

Monday, October 25, 2010

Can You Say Circus?!? Circus Elephant on Ball - MTC or .svg File

Hello.  Welcome to the Circus!  I have been busy at my children's school the past few weeks helping make decorations for our annual carnival fund raiser "Webbfest" that we do each year.  This year's theme was the Greatest Webbfest on Earth and was based on the Circus.  I will show you several things that I did to help the decorations committee.  This is the first one.  This is from a coloring page we found simply by doing a google search for free circus coloring pages.  I then used my Make the Cut software to pull it in and create a cut file for use with my Cricut machine.  I have then used my MTC software to export it out as an .svg file for use by those who may use other software and/or cutters.  (I took that .svg file and broke it apart in Inkscape and that is the file I am sharing here).

Isn't he cute?!  If you would like my MTC file you can download it here.  If you would like the .svg file, you can download it here.  Sorry, but you cannot use .mtc or .svg files with Design Studio (DS) or the Gypsy. However, I will be showing you some cute things we made with the PC cartridge, Carousel, as well.  I bought that cartridge specifically for us to use with our Carnival this year.  Money well spent as we did LOTS of things with it.  However, they really wanted an elephant on the ball like this one and there wasn't one on the cartridge.  So, I quickly found this one and made the file and cut him out for them.  They were amazed how easy it was to do!
Just a quick note:  If you have been considering purchasing MTC, you might want to do so this week.  A new and improved version of MTC is coming within the next few weeks and if you already own MTC, there is never a charge to upgrade.  However, there are some significant new features that are being added as well as support for use with at least one other cutter and I suspect (have no actual knowledge of it however) that there might be a price increase coming with these new improved features.  The software will still be worth the money with the new features being added BUT why pay more if you don't have too?

To find out more about Make the Cut go to their website here: http://www.make-the-cut.com/
Note:  I am not affiliated with MTC and I do not get any money for others purchasing it.  I am just a happy user who knows what all you can do with it and that even more is coming very soon.  MTC and SCAL both are why I still have my Cricuts and didn't buy another cutter because they let me truly create as I want! However, since I still have my Cricuts, Gpsy, and DS I still buy cartridges thus a win-win for me and PC!

Friday, October 22, 2010

Backpack Box

 A few months ago, Lariea posted on the "Make The Cut Forum" about these cute little backpack boxes that she had made. CaseysAngel(Christy) then went and found the pattern and directions on the Splitcoaststampers website. They were created and posted by Mary Arima on that site.  Her blog is "PaperJoy".  I couldn't resist making one.  Actually, my plan was to make several as treat bags for my DD's volleyball team.  However, they were a bit "fiddly"  LOL and I decided there was no way I was making that many (it would have been more than 20 as she plays both JV and varsity!!) so this is a "one of a kind"!

However, it wasn't nearly as "fiddly" as it could have been. Thanks to Rachellann ID #714, on the Make The Cut Forums who made a .mtc cut file for this pattern.  It is an awesome pattern that includes both the cut lines and then the score lines.  Just close the layer (close the eyeball) with the score lines when you cut it out, then close the layer with the cut lines and open the layer with the score lines, change the pressure to light and the blade depth to about 1 or 2 and "cut" the score lines.  It won't actually cut them all the way through but will allow you to score and fold as needed.  You can find Rachellann's .mtc file for this on the Make the Cut Forum here.  You will have to scroll down through the thread a little ways to find it.  You wil also see Lareia's picture of the cute ones that she made at the beginning of that thread.  As a result, I don't have any cut files to share here.  Just a picture of the one I made and the links to the patterns and directions as provided above.  

I also found a .svg file for the same or similiar type file here on cricutcraftyclare's blog. She indicates that she got her original file from Nancy who had created the file in DS from the splitcoaststamper's directions and template.  Nancy doesn't have the DS cut file on her blog but she does say that you could contact her if you wanted one of her files.  You can find Nancy's post on these backpacks on her blog here at Nancy's Craft Spot. Finally, I also found a post of a .svg file with or without the scorelines on the SCAL forum.  It was posted by dchiu1 and can be found here. So, hopefully between these multiple sites, you should be able to find a cut file that will work for you no matter what cut file or software that you use. Thanks for stopping by.

Wednesday, October 20, 2010

Embossed Paper Birds - Project from JoAnn's


This project came from one of those free project sheets from JoAnn's. You can find the complete project information here at JoAnn's website. You will also find a better picture of the final project there as well.  I took the pdf file provided and created a cut file for use with my electronic cutter.  You can download the embossed paper bird .mtc cut file for use with Make The Cut here.  You can download the embossed paper bird .svg file for use with other software and cutters here.  Be sure to download the PDF file for assembly directions from JoAnn's site here. I used cuttlebug embossing folders to emboss the flower (dots) and the bird.

Monday, October 18, 2010

Totally Totebag

PLEASE NOTE:  Make the Cut (.mtc) Download link is now Fixed.  Thanks for those who let me know!


A friend asked me if I could create a file for cutting with our electronic cutters based on the "Totally Totebag" instructions and pattern posted on the Splitcoaststampers.com website by Leigh O'Brien.  You can find Leigh's directions and information on thte Splitcoasterstamper's site here.  You can also find it on Leigh's blog  "Sunflowerstudio" along with more cute ideas and projects. I have only made a "rough draft" of the totebag to make sure that it cut out properly.  To see more (and prettier) photos of assembled projects check the splitcoasstampers site here. Thanks Leigh for sharing.

You can download my .mtc cut file for use with Make The Cut here. (FIXED THANKS!) You can download my .svg file for use with other software packages or cutters here.  (Note:  You cannot use these files with either PC's Gypsy or Design Studio (DS) but you can use it with a cricut machine if you have Make the Cut or SCAL).
The finished bag measures: heigh:t 2 3/4",  width: 3 3/4", and the depth: 1 1/2".  It is just right for a gift card holder or a little snack or small treat. Thanks for stopping by.

Friday, October 15, 2010

Flap Card

I was browsing around the other day on Splitcoaststampers.com and ran across this cute "Flap Card" created by Rose Ann Reynolds.  This is a simple tri-fold card that makes a small card or can serve as a cute gift card holder. You can find the Tutorial with the directions and pattern on the splitcoaststampers site here.
You can also go check out  Rose Ann's blog, "Paper Delightz," with other cute ideas and projects created by her.

I made my "flap cards" into Halloween cards.  I have made them into gift card holders and plan to put $5 McDonald Gift Cards in them for my children and my nieces and nephews. To use as a gift card holder you can either use a kraft knife to cut "slits" into a couple of corners of the mat inside to hold the gift card (use the card to position where the slits need to be placed), or simply put some repositionable glue on the back of the gift card, or make a pocket out of the inside mat (you may need to cut that down a little to create the pocket and still be able to see the gift card).  The finished size of the card is 4.25" tall by 3.5" wide.  Just the right size for a gift card holder.

Download the .Flap Card mtc file for Make The Cut here.  Download the Flap Card .svg file here. Note that my .mtc file has information and notes available under the Notes Bar.  Sadly, I cannot add "notes" to the .svg file.  So I will note here that I have added two "flaps" for the "flap" should you wish to add mats and decorative paper to the front flap of the card.  It then has 1 smaller mat overlaying decorative paper to the larger mats that are there to cut and use on the outside and inside of the card as used on Rose Ann's sample pics in her Tutorial.  Thanks for stopping by.  Would love to see what you do with my files!

Wednesday, October 13, 2010

Spartan Head

I have previously shared this Spartan Head a long time ago as a .scut file.  I have converted it into a Make the Cut file (.mtc).  My children's school's mascot is the Spartan's so it gets a lot of use around my house!  I took one of their logos and converted it into a cut file.  Hope someone else can get some use out of it.

Download the Spartan Head .mtc file here.  Download the Spartan Head .svg file.

As always, I would love to see what you do with any of my files.  Thanks for stopping by.

Monday, October 11, 2010

Jack-O-Lantern Basket


This is a quick and easy project using your electronic cutters and a small basket.  I am not sharing any cut files as it would be easy to recreate my idea but the sizing will vary based upon the basket used.  Leave a comment with your e-mail address should you have questions.

Measure the "circle" of your basket and cut a circle out of orange vinyl to fit the lid of the basket.  cut around any hinges that may be on the top of the lid (mine had a leather strap that I used to be the "stem").  Apply the orange circle to the top of your lid.  Then cut out the jack-o-lantern's face from black vinyl.  You could use Pumpkin Carvings cart from PC or use the dbjackopatterns from Lettering Delights to creat a .svg or .mtc file or any other place you can find "jack-o-lantern" faces.

Saturday, July 24, 2010

1 Fish, 2 Fish, Red Fish, Blue Fish

Hello.  A Message Board Friend asked for help in making .svg files of Dr. Seuss' One Fish, Two Fish, Red Fish, Blue Fish.  She is in turn helping a friend who is decorating her nursery with Dr. Seuss.  She had found several other Dr. Seuss images as .svg files already, but hadn't found the fish.  I told her I would be happy to help.

 I found a coloring book page online and used that to create the images.  There are two layers to most images, the base layer which is black and then the top layer which is the color of the fish.  A couple (the red fish and blue fish) also have white eyes as another layer to cut.  All of them have a few small pieces that aren't part of the "whole".   They could have been taken into Inkscape and edited some of the nodes so that the top was just one piece.  I just didn't have the time to do that.

These files are no longer available sorry.  Thanks for your understanding.

Sunday, June 27, 2010

Treasures of the Sea

I have previously posted about getting patterns to cut from Scroll Saw magazines and websites that you can use to create cut files for use with your Cricut.  Obviously, to do this you would need to have a 3rd party software like Make the Cut (MTC) or Sure Cuts a Lot (SCAL). So I always take a quick look at scrollsaw magazines whenever I see them to see if there are patterns I would like to use with my Cricut. As a result, I quickly purchased a news stand copy of Issue 39, Summer 2010 ScrollSaw Woodworking & Crafts magazine when I saw these Treasures of the Sea items.  Interestingly, it wasn't until after I bought the magazine and had created the .mtc cut files that I actually read the full article and see where it notes that these patterns were orignally designed as paper cuttings and that many paper cutting patterns are easily cut on a scroll saw! LOL


The website for ScrollSaw Woodworking & Crafts magazine is http://www.scrollsawer.com/. This site has lots of information including various patterns you can download directly from their website. Many of them can easily be used to create and cut with paper on your electronic cutters.

The particular article that drew my attention in the Summer 2010 edition was entitled Treasures of the Sea. The article and the patterns used were created by Gloria Cosgrove (the actual cuts shown were done by Linda Heigerson.) Gloria and her daughter, Alison, specialize in "scherenschnitte" (paper cutting) patterns.  These patterns would have originally been designed to be cut by hand.  They have a mail-order business selling original art work and paper cutting patterns.  Their website can be found by visiting http://www.papercuttingsbyallison.com/. Be sure to check it out for some beautiful artwork that coud be made into files to cut with an electronic cutter like the Cricut and others using software like MTC or SCAL.

For these items, there were 6 patterns provided for different seashells and a sea horse in the magazine. I took the patterns and scanned them into my computer and used Make The Cut (MTC) to create cut files to cut with my Cricut.  As you can see, there is a lot of delicate detail in the cuts. However, they pulled in quite well into MTC.  I did end up pulling a couple of them over into Inkscape to do some node modifications in a few spots. They cut just fine with MTC and my Cricut.  I used the items I cut to make cards.  I think the cards could be used for a variety of needs such as sympathy, thanks, or any other need.  They could also be used to create home decor items like framed art (this is what they were in the scroll saw magazine for) or even vinyl on a wall or used on a scrapbook page. 

I really would love to share these files with you BUT unfortunately I don't think that I can! Since the patterns appear in the Scroll Saw Woodworking & Crafts magazine, it indicates that the copyright belongs to them.  The pattern pullout sheet then indicates that you can make up to 10 copies for personal use "for the buyer of the magazine".  However, I hope by posting them here for you to see, that you will also see that there are other places to look for patterns and ideas of items to cut with your Cricut and/or other electronic cutters.  In addition, scroll sawers may see a new way to get their patterns ready to adhere to their wood to cut with.  Thanks for stopping by!

Saturday, June 26, 2010

Car Decals made with Vinyl

Nicole had seen the post I made last year showing the car decals I made for my children's sports.  You can see them here:


[dies+&+cards+Aug.+2009+011+(Small).jpg]
Sports Decals

She wanted to know how I had removed some of the "lines" from the Volleyball and put in the volleyball player, my daughter's name and school name.  These were created with Design Studio and the Sports Mania Cartridge.  I used the "hide contour feature" in DS to hide the lines that I didn't want to cut.  It is very simple to do and they recently updated the Gypsy software so that hide contour is now available on the Gypsy as well.

I had to answer here on the blog as Nicole didn't leave me an e-mail address to contact her at.  I hope she comes back to find my answer!  LOL  Please be sure to leave me an email address in any comments if you need me to get back to you directly.  Thanks for stopping by.

Converting Different Types of CUT fils for use with the Cicut Machines

So you have a Cricut and you heard that you could use other software packages to cut more things with it then just those provided on a Cricut cartridge and you are wondering how you do that.  To get started, you might want to refer back to my post from April 25, 2009 entitled: What is a .cut file, a .scut file and a .svg file and what does it matter?  you can find it here:

http://meflickcricutandmore.blogspot.com/2009/04/what-is-cut-file-scut-file-and-svg-file.html

Now we need to add a couple of other file types into the mix that were not discussed in that post.  Since making that post, SCAL2 has come out as well as Make The Cut (MTC) and the Gypsy. The file extension for SCAL2 files are .scut2.  The file extension for MTC files is .mtc.  In addition, PC introduced a new handheld device called a Gypsy.  File extensions of files created with a Gypsy are .gypsy.

So depending on the software you choose to get, your cricut can cut out an image from a .cut file created with PC's Design Studio (if you have the cartridge that was used to create the file), a .scut or .scut2 file created with SCAL1 or SCAL2 (note SCAL2 can open a SCAL1 or SCAL2 file - SCAL or SCAL1 cannot open a SCAL2 file.  You know which version of SCAL was used to create the file by looking at the file extension.  A .scut file was created with SCAL(1) while an .scut2 file was created with SCAL2.  In addtion, your cricut can cut a .mtc file created with Make the Cut (version 1 or 2) or a .gypsy file created with a Gypsy.  However, you would have to have each of those packages to use any of those file formats. Each have pros and cons that I won't go into here.

BUT - if you can find a file in an .svg file format ( svg stands for "scaleable vector graphics") THEN you can IMPORT that .svg file into any of the SCAL versions (1 or 2) OR MTC versions (1 or 2) and then cut it with your Cricut.  HOWEVER, you CANNOT USE a .svg file with either the DS or Gypsy software from PC and you cannot use a DS .cut file or a .gypsy file with either version of SCAL or MTC.  You also cannot open a .mtc file from Make the Cut with any program other than MTC. (However, if you have MTC you can EXPORT your files into many different formats to share with others and/or user with other cuters beyond a Cricut!) MTC has also recently added a "beta test" in it to IMPORT SCAL .scut and .scut2 files into it (I have not tried it yet to see how it works). You can take a DS .cut file and convert it to a .gypsy file and/or take a .gypsy file and covert it to a DS .cut file. However, you must have a licensed version of the DS software to do this. You CANNOT directly open a DS .cut file or a .gypsy file with any other program.

So, in summary - to cut a DS .cut file or a .gypsy file you would need that software and the cartridge(s) used to create it.  If you have a purchased copy of DS -you can convert DS .cut fies to .gypsy files and .gypsy files to DS files..

To cut a .scut or .scut2 file you would need SCAL or SCAL2.  (SCAL2 will cut both; SCAL will only cut. scut).  You may be able to import these into MTC and cut with it. This feature is a beta test in MTC right now.

To cut a .mtc file you would need MTC version 1 or 2.  Again, MTC2 will cut both version 1 or 2 files - the original MTC will not open or cut a version 2 file.  If you have MTC, you can EXPORT .mtc files into many other formats to use with other packages and/or cutters beyond a Cricut.  (In addition, MTC has added other importing features to work with other options to get files into your program.  Please see the MTC official site for full details.)

A .svg file can be used with any version of SCAL or MTC.  However, it must be IMPORTED into the program rather than simply opened.

This is just the very basic information to help you start to understand the potential available with your Cricuts and software programs available to use with it.  I would recommend that you check out all the appropriate websites for each software program to get the most up-to-date information available regarding each.

One final cavet that I will point out.  PC says that use of other 3rd party software will void your warranty.  Your warranty on your machine is 1 year so if your 1 year is up, no problem.  I will also tell you however that none of the 3rd party software does anything to your cricut.  They simply talk to your cricut through the computer - the same way your computer talks to your printer.  I have been running 3rd party software with my cricuts since they (the 3rd party software) were first released and have never had a problem with my Cricuts not working properly.  My Cricuts are now 3 and 4 years old. However, I did want to make anyone aware of this in case you weren't!  It really shouldn' be an issue or a concern.

There are trial versions of MTC, SCAL, and DS available for you to download and try if you want to check each of these packages out.  Each website also has User Forums available for questions and help.  I would recommend that you download a trial of each to find the one that works best for you.

If you have never used any of these software packages with your cricut before, you may need to update your cricut firmware and/or drivers to get them to work properly.  Each site will give you information regarding how to do this.

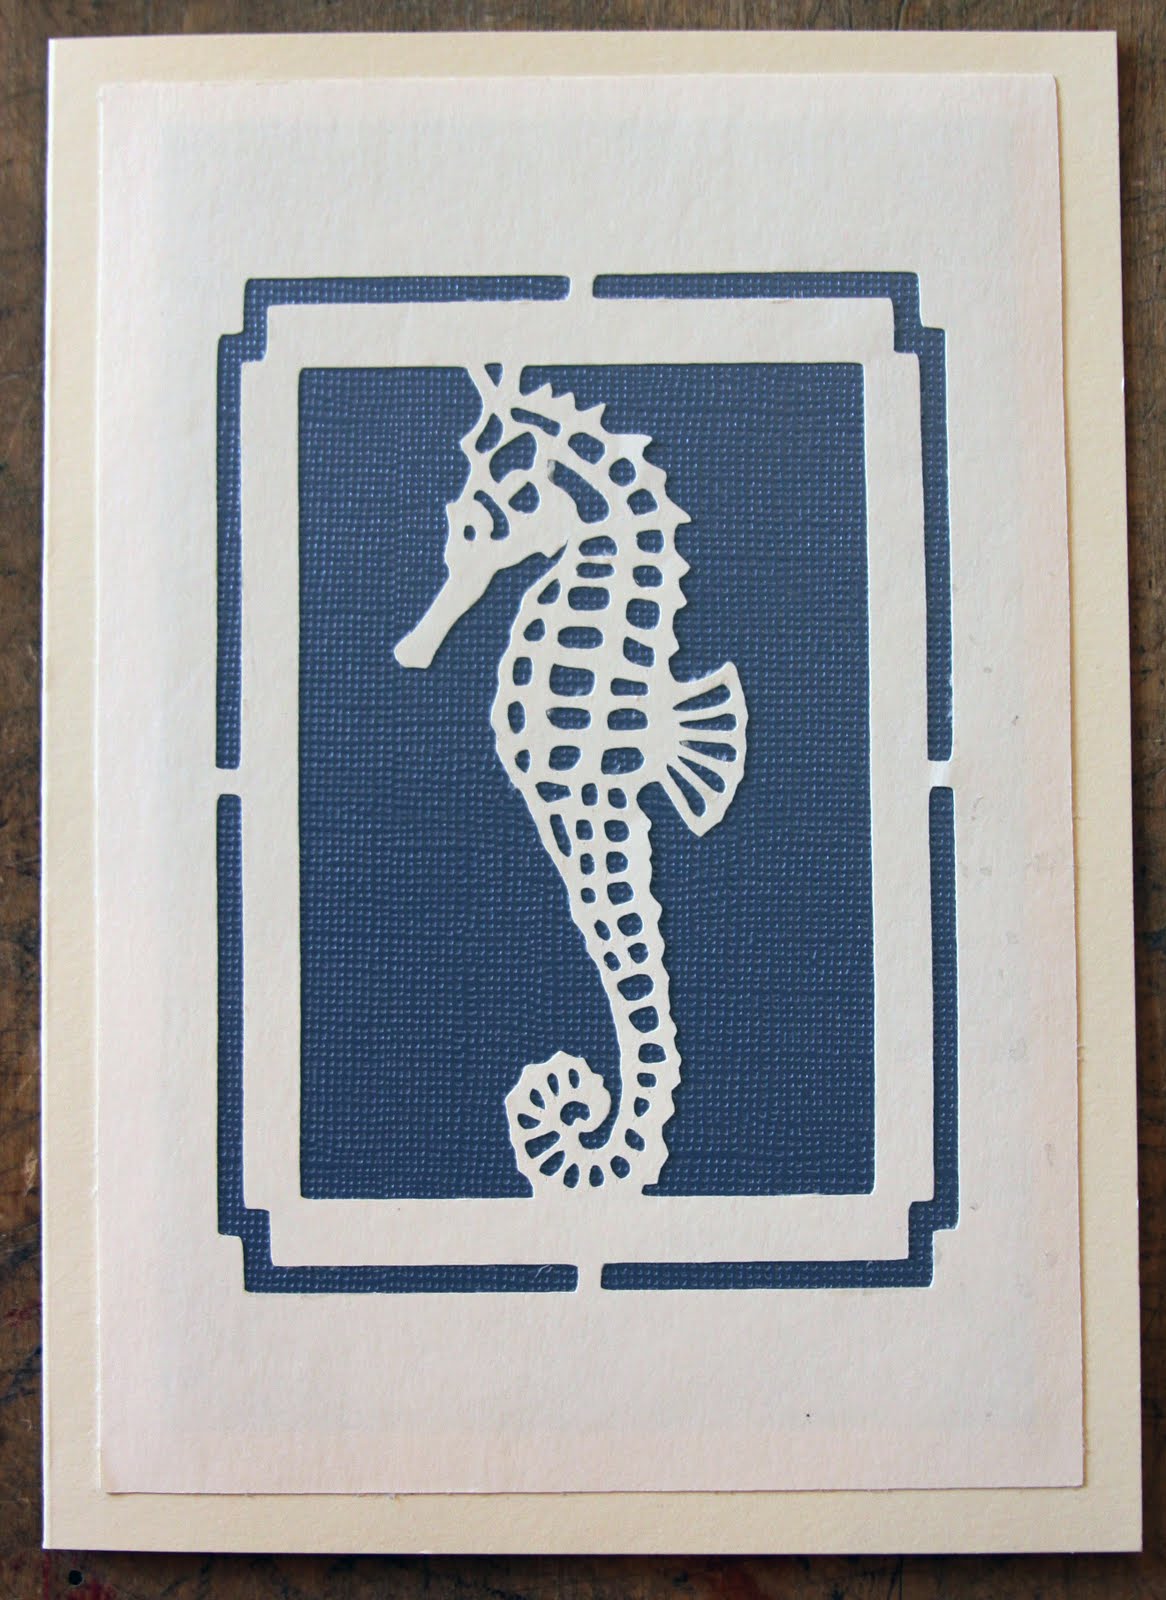
Thanks for stopping by.  I have some new files to post shortly of "seashells" that I have cut with MTC.  I hope to get them up later today or tomorrow.

Saturday, April 10, 2010

Round Top Treat Box now available in.svg and .mtc formats

I wanted to let everyone know that I have been recreating some of my original .cut files into .svg and/or .mtc files for my friends who may only have cutters that will use one of those formats.  The first one I was going to "reshare" here is one I called the Round Top Treat Box.  You can see my original post of it here where I show it made into a "bunny box" and another one with a Mickey Head:

http://meflickcricutandmore.blogspot.com/2009/03/round-top-box-look-what-you-can-do-with.html


As always - please let me see what you might create with these files.  If you see other older files here on my blog that you need in another format, let me know and I will try and accomodate you.  Thanks for stopping by.

Monday, March 29, 2010

Sock Monkey and Banana now in SVG format

Okay.  Finally found a few minutes to make the conversion asked for on the Sock Monkey to an .svg format!  Sorry but I have DD doing traveling Club Volleyball (VB) team and DS doing traveling Club Basketball team so time is limited.  Plus our Spring Break is this week.  Anyway - finally figured out or remembered that you can right click in Make the Cut (MTC) and get it to EXPORT to an .svg file!  That was Easy!!  LOL

So, if you want the .svg files for either the Sock Monkey and/or the Banana files you can  download the Sock Monkey in .svg format here.  You can download the Banana in .svg format here.  If you have SCAL2, you can download the .scut2 file with both the Monkey and the Banana in one file here.  Let me see what you do with any of these files!  Thanks for stopping by!

Friday, March 26, 2010

Banana for Sock Monkey - MTC 2.2.1 File

Here is a Banana for the sock monkey.Wouldn't want him sitting around hungry! It is for MTC 2.2.1. It has 3 layers to it.  You can "hide" the layers and cut out one at a time, or separate them and lay them all out on one mat with your different colors of paper and cut once.  You decide.   You can download the banana MTC file here.

I have had one request for the sock monkey in .svg format.  I will try to get both the monkey and the banana into an .svg file soon.  Please let us see what you do with these files. It's so much fun to see someone actually put your work into a project!  Thanks for stopping by!

Wednesday, March 24, 2010

Sock Monkey for Make The Cut (version 2.2.1)

Hello friends.  Well, as most of you may know from reading my blog I have 2 Cricuts, Design Studio, a Gypsy, SCAL (Sure Cuts a Lot) and MTC (Make The Cut).  As a result, I post a variety of files here.  Some have mulitple files types and some only one.  :(         (This has a lot to do sometimes with my limited amount of time as the mother of two very active middle school aged children). However, if you ever see one of my files you would like and I haven't provided it in a format that works for you, just leave me a comment at the end of that post. Simply click on comments and leave me a note requesting another format.  I won't promise that I will make it in another format or how long it will take for me to do it in, however, I will look into it and try to do so if I can when time permits.

This file is one of a Sock Monkey.  However, to date, I only have the file available for Make The Cut (MTC) version 2.2.1 with its use of layers. 

I really like this feature of MTC.  I haven't had a lot of time lately to play with this new version, but so far, I really like what I have seen.  You can download a trial version (or purchase the full version!) of MTC by going to their website at http://www.make-the-cut.com/. You can use all the features of MTC in the trial mode, but it will cut a watermark through the images until you purchase a licensed version.  I think it is a great enhancement to the arsenol of tools for use by Cricut owners.

You can download my sock monkey file for MTC here.  As always, this file is for personal use only.  Please let me see what you do with this file if you do use it.  Leave me a comment f you have any questions or problems with this or any of my other files.

Also, if you are new to my blog - check out my older posts.  I have a variety of cut files for Design Studio, Gypsy, SCAL, MTC and .svg files for use with both SCAL or MTC.  You might find something else you like.  There are lots of gift card holders, treat bags or boxes, a cupcake box, and lots more. Plus, DazyCutr has shared some pretty great looking cards here.   Let me know if I can help with something you need but can't find. Thanks for stopping by!

Friday, March 19, 2010

Manly Card - Vest for Dad - .svg and .mtc files for use with Cricut

Hello. I was looking back through my huge stack of "ideas" and ran across a project that I had been working on a while back.  I decided to finish it up and put it out here to share with the Cricut and blogging world.  I found the original pattern in a February 2008 edition of Paper Crafts magazine (page 60) entitled Vest Card. You can find the magazine's website at  http://www.papercraftsmag.com/index.html. (Unfortunately, the website no longer goes back to that edition!)  The article notes that the design was courtesy of Tinkering Ink & Mainly Stamps.  I believe Tinkering Ink's website address is: http://www.tinkeringink.com/ (but I didn't find anything there related to this Vest Card.)  I have seen other "vest" cards in the past, but this is where I got my pattern from.

First, I copied and cut out the pattern provided in the magazine.  I then enlarged it and scanned it.  I usually scan it in and save it in a graphics format like .jpeg or .png and then import that into Inkscape to get an .svg file.  I then take the .svg file and import it into either Make the Cut ("MTC") or Sure Cuts A Lot (SCAL). 

There really aren't any "directions" to prvide. Once you cut out the card from a patterned cardstock, you simply fold the card at the middle of the arm holes so that the points of the bottom of the vest line up.  The "flat" side of the vest (as opposed to the pointed side) is the outside overlapping flap.  The .svg file does not have the "pocket" and the "hankie".  I created those and imported them directly into MTC from the scanner.  Glue the "hankie" to the backside of the "pocket" and then glue the pocket onto the front left side of the Vest.  You can then create "buttons" or add real buttons to the right front side of the Vest.  I created buttons with a small hole punch and glued them onto the card front. Then used a marker to make button holes.

You can download the Vest Card .svg file here.  If you have the latest version of the Make the Cut (MTC) software (not the beta 2.x version) you can download the Vest Card .mtc file here.  The MTC file is sized correctly and has the pocket and the hankie cuts as well. As always, let me know if you have any problems with any of my files and I would love to see what you create with any of them!  Thanks for stopping by.

Wednesday, March 17, 2010

Brownie Mix Gift Box - Requires Expression 12x24 and George Cartridge

Okay, CrazyScrapper also wanted help with another file.  This one was a "Gift Bag Carrier" for a box of Brownie Mix with a side pocket for a spoon or whisk.  Due to the size to cut, you will need the Expression machine, a 12x24 mat with 18"x10" paper at least, and the George cartridge.  There are cut files here to share that I have created for both the Design Studio (DS) software and the Gypsy.  If anyone wants one for SCAL see the link below to Jamie Lane's blog. 

The paper I used was a piece of the 12/x24 K&Co. pad that I found at our local Michael's.  I'm not crazy about the designs in it but hey, its larger paper with designs. I hope they come out with more and better designs this size like some other K&Co. paper I do like!  The card was made with Wildcard and leaves from anothr cartridge (sorry, don't remember which one!)
CrazyScrapper first saw the idea for this box on NikkiGirl's blog which you can find here:

http://mypolarexpressions.blogspot.com/2010/01/brownie-boxes.html

Nikki mentions on her blog that she had created a .cut file in DS using the George cartridge to make her box. Unfortunately, for CrazyScrapper and me, she hadn't shared her actual cut file.  She did however mention that she had seen the idea on Jamie Lane's Blog but that Jamie only had the file for SCAL which Nikki didn't have.  So, I followed Nikki's link back to Jamie's Blog here:
http://jamielanedesigns.blogspot.com/2009/12/brownie-boxes.html

Since CrazyScrapper needed a Gypsy file, I followed the link from Jamie's blog to her word document which shows the basic layout with cuts and score marks.  (The cuts are the red and geen lines, the score lines are the black lines).  So, based on Jamie's word document, I also created my own DS .cut file using the George cartridge for this brownie mix gift box.  Once I had the DS .cut file (I used DS because I wanted to work with the bigger screen on my computer and thought it would be easy to convert), I attempted to convert the file to a Gypsy file.  Well, that was easier said then done for a lot of reasons (some of which I plan to report to PC as bug/issues!!).  However, not to be out done by a crazy Gypsy, I finally managed to get a .gypsy cut file for CrazyScrapper to use. (I basically went back to the "drawing board" and recreated the file a second time on the Gypsy).

Two things I will point out on the Gypsy file. First, all the cut lines can be seen in the preview mode when you first highlight the file but may not show on the screen when you open the file unless you Zoom in on those areas.  Second, it appeared from Jamie's file that her basic layout was about 17.25"x10".  This is what size I created the file in DS and it worked to hold the Brownie Box.  However, when I used those same measurements on the Gypsy file, the file cut shorter then 17.25".  I had to bump the size up to 19"x10" to get it to cut out to the same size as the DS .cut file!  HOWEVER, I only used a 12x18 piece of paper so no way did it cut out at 19"! As a matter of fact, I measured the cut out and it WAS NOT 19" but about 17.25".  I put together mockup cuts of both DS and the Gypsy files and they look identical in size!!  Go Figure.  (If anyone ever wants to know the other crazy things the Gypsy did when working with these files, bring over a bottle of wine or margaritias sometime and we'll chat!  LOL)

You can Download the DS .cut file here.  You can Download the Gypsy cut file here

If you have SCAL, you can go to Jamie Lane's blog link I provided above and download her .scut file from there.  She didn't provide the file in an .svg format so my Make The Cut friends are out of luck for now unless someone wants to convert it to a .svg and/or MTC file. LOL  (Sorry, I'm done with this file for now! LOL - I might do it later!)  As I already noted, you can go to Jamie's blog to get the scoring information in word format at the above link as well.

We have new neighbors moving into the neighborhood that we already know so I think that I will use this to take them a "welcome to the neighborhood gift"!  They know my kids keep me too busy for me to have time to actally bake the brownies myself!  LOL Thanks CrazyScrapper for pointing me towards this box idea.

Tuesday, March 16, 2010

Rheba's Notecard Organizer Box - ah la Cricut Bug


Here's a photo of the notecard/organizer box that Rheba made.  She added a cricut bug head to her's.  She is going to use it to store her beautiful cards in when she makes them!  Didn't she do a fabulous job! You can get a .cut file for this box/container in the post below.  Let us see what you do with yours.  Thanks again to everyone whois responsbile for me getting this file so I could make a .cut file from it!

Monday, March 1, 2010

Notecard Organizer Box - Expression and George cartridge needed

Hello.  Here is a great Notecard Organizer Box.  I have created it as both a DS .cut file and a .gypsy file. Due to its size, you will need the Expression, the George cartridge and a 12x12 mat.  I may try to get it into an .svg file shortly for my SCAL and MTC friends.  Just so many hours in my day however so it may be just a bit!  If anyone really wants it as an .svg, let me know by commenting here and I'll try to push it up more on the "to do list".  If I don't hear from anyone then I may just leave it "undone"!

The directions and information for this file was given to me by Margaret  or mlharrell on the Cricut MB.  DazyCutr (Rheba) and I went to Margaret's last week and we made some of these cute boxes. The box pictured on the top left is the box I made at Margaret's.  We used a hole punch for the scalloped edges on the half circle cutout.  I told her then I would probably be making a .cut file (since I am handcutter and ruler challenged) and so it would be easy to make more.  So here it is Margaret!  Thanks for sharing it with me!

 It is my understanding that the directions were given to Margaret from her Stampin Up sales woman/friend, Kathy Hines.  The directions/info. I have says the original file was created by Lauren Meader and modified by Kim Cagle.  So thanks also to all of you for sharing this cute box and I hope that no one objects to me creating files for use with the Cricut, Design Studio and/or the Gypsy.  Unfortunately, I have no information on how to contact the orginal creator.  However, besides crediting them here, you will find credit given to them on the last page of the .cut file (I deleted it from the .gypsy file since it just cluttered up the file the way the gypsy shows all pages!)

I am also including a PDF file that shows the three pages of the .cut file with the score lines marked and the sizing of each piece of paper.  I did combine the Front Decorative Mat layer with the Front Panel on the first page of the .cut file.  You will probably want to use two different pieces of paper here that contrast.  The PDF file also tells the measurements used so if you don't have the Cricut you could probably still use it to hand cut the pieces you need and make the box.

Please let me know if you have any questions or problems with any of the files.  I'm thinking about making a video of how to put the box together but not sure I am willing to go there just yet.  However, DH did get me a Flip HD last year for my bday so I have the equipment just not the guts yet!  LOL

So, without further ado here are the files you will need to download.


Download the Design Studio .cut file for the Notecard Organizer Box here.

Download the Gypsy file for the Notecard Organizer Box here.

Download the PDF file for the scorelines and other information for the Notecard Organizer Box here.